subtlemark : Watermarking Images
A quick look at how to automate the process of adding subtle watermarks to images.
1. Configuring Fonts for ImageMagick
Since I want my watermark as subtle as possible, I'll use a tiny font,
If for some reason the
The newly generatedfile
  <type
     format="ttf"
     name="Silkscreen"keyfunc-output-overlay.png
     fullname="Silkscreen"
     family="Silkscreen"
     glyphs="/home/okami/.fonts/slkscr.ttf"
     />
        ]]>
3. Key Functionality
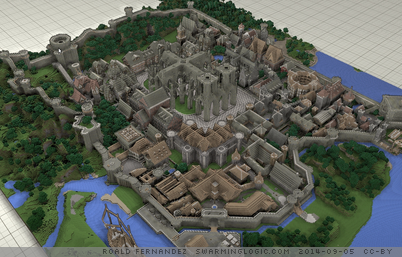
Extending image with watermark label
The following snippet shows how the

(Click to enlarge) |

|
Overlaying watermark on top of image
Changing the image size can mess up the perfect screen resolution of an image. Here is a different snippet, that draws a rectangle on top of the image, and the text on top of that again.
|
(Click to enlarge) |
|
4. Bash script
I got carried away with adding features to the script
Add a watermark overlay to an image. The caption should say "SwarmingLogic",
be on the top left, with text color
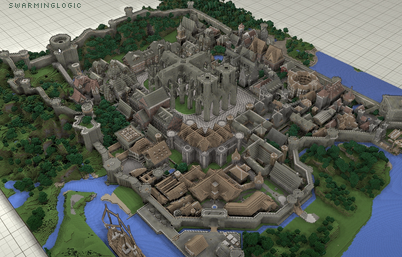
Table of Contents
Top 1. Configuring Fonts 3. Key Functionality Extending image with watermark label Overlaying watermark on top of image 4. Bash script
Tags
License

About
Roald Fernandez
Norwegian software developer
Thinks alpacas are underrated
Newsletter
